Sunday, December 28, 2014

[Workaround] Running Ansible on Windows

Introduction

Maybe you saw my previous post where I configured a Zabbix server with Ansible. Since Ansible is not supported on any Windows platform I was using a VM with CentOS on it. This quickly became a struggle to constantly change from Windows to CentOS and vice versa. So I did some research and came across Cygwin. With this program it is possible to run Ansible but it's not officialy supported. But I don't have any issues at this moment on Windows 8.1 Pro.

How do we install Ansible?

Ofcourse the first thing we need to do is install Cygwin. Click here to download (32bit - 64bit). Open the setup and select the following programs to install:
  • curl
  • git
  • vim
  • openssh
  • openssh-devel
  • python (2.7.x)
  • python-crypto
  • python-ssl
  • python-setuptools
  • make
  • gcc-core

Once the setup is completed fire up Cygwin. The program is called "Cygwin Terminal", you should get the following screen.


Now you can follow this series of commands:


After adding my hosts and keys the same way I did here I was able to shutdown my CentOS machine and use my Windows machines to manage my Ansible setup :).


Friday, December 19, 2014

Configure Zabbix Server on CentOS 6.6 with Ansible

Introduction

Soon I will start my internship and I received the question if I knew something about this topic. Since I do not have any experience with Zabbix I wanted to configure this server in my test lab. In this post I will configure a CentOS 6.6 machine as Zabbix Server to monitor some Windows machines. To make it even more interesting for myself I used Ansible to configure it all.

What is Zabbix?


Wikipedia: "Zabbix is an enterprise open source monitoring solution for networks and applications, created by Alexei Vladishev. It is designed to monitor and track the status of various network servicesservers, and other network hardware."

Used Tools


- CentOS 7 Workstation to configure Ansible playbook's.
- CentOS 6.6 Minimal for Zabbix Server
- Hyper-V running Windows Server's / Zabbix Server

Prepare Server to accept Ansible Playbooks


Configure Ansible and run the Playbook


After these steps Ansible should be able to talk to our configured servers. We can test this with a single ping. The command used for this is "ansible all -m ping", this command pings all the servers in the hosts file from the previous step.

Ansible can communicate with our other server.
Next we need to configure the path where our Ansible roles will be located. This file can be found here: "/etc/ansible/ansible.cfg".


Now we have defined the path, lets make the necessary folders and files for Zabbix.


Here we configure the right roles for our hosts.
Now we can create the other files and folders for Zabbix.

main.yml (task folder)


MariaDB.repo (template folder)


zabbix.conf (template folder)


zabbix_server.conf (template folder)


Running the playbook


Configure Zabbix

Now open your web browser and navigate to "http://<your server ip>/zabbix".


Add Windows host


Install agent on Windows machine


Start the service

Now the only thing we need to to is to configure the firewall to allow traffic on port 10050. I created the following rule for this. You might want to configure it more aggressive in a production environment.


Result


Monday, December 8, 2014

Using Windows Deployment Services on 2012 R2

Introduction

I always wondered how bigger companies with a huge amount of new computers configured them all. Installing it on one of the new pc's and then clone the HDD is an option. But today we are using the "Windows Deployment Services" With this you can install an operating system over the network. More information how it works I will not cover, just go to Wikipedia.

Testlab in school.


Installation steps

First we need to install the role.

Install "Windows Deployment Services".
Open the "Windows Deployment Services" management console.
Open the configuration wizard.
Follow the steps in the wizard.
We are using this server in a domain so we want to integrate it in the AD.
Because this  is just a test server we use the default location, in a production environment you won't use this.


Let the wizard do his job.
Yes, we want to add images to the server...
I mounted the ISO of Windows 8.1 to the D drive, this can be different in your setup.
Insert a group name for this image.
Check your settings.
The wizard is now copying the necessary files to the server.
The import is done.
Next open the "Windows System Image Manager (WSIM)". Here we will create our answer file. The link to the download can be found at the bottom of this post.
Now we need to import our installation of Windows.
Choose the "install.wim" from your installation folder. This is located in the "sources" folder.
Now we need a distribution share to work in.
Select a folder.
Now create a clean answer file.
Now scroll in the Windows Image Components section. Search for "Microsoft-Windows-International-Core-WinPE", right click it an add it to the WindowsPE setting.
Specify the settings, my InputLocale is for Belgium, this can be different for your language. A list of codes you can find over here.
You can specify the language of the setup over here.
Next add the "Windows Setup" module to the WindowsPE.
You can delete the settings you won't change.
Insert a new disk. And configure it like here. This setup is for EFI, of Gen2 Hyper-V machines.
Get the filename and name of the version you want to install.
And enter it over here.
Here you specify to which disk and partition you want to install windows. 
If you don't want to enter your credentials every time you can enter them over here. If you don't you will be prompted for them when the installation starts.
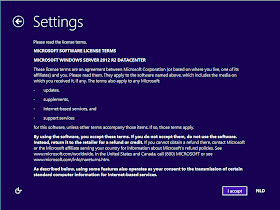
Automatic accept the Eula.
Next add the shell setup to the specialize.
You can configure the computer name.
Now add the Shell Setup to the oobeSystem.
And configure the local administrator password if you want.
Save the answer file in Deployment folder.
Now we only need to configure the server to choose this answer file when a PXE request is received by the server.


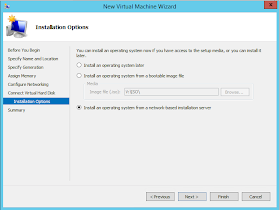
Now we can test!


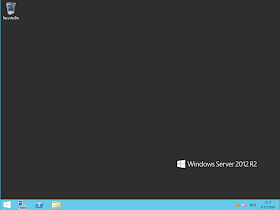
Now I can create a new test-server by just adding a new VM in Hyper-V. It will automatically install the OS and configure the basic steps.

Links

Windows System Image Manager (32 bit)
Windows System Image Manager (64 bit)